|
When BMW announced the new BMW Motorrad Navigator V (NAV5) back in September, 2013, it was not unexpected but for many the shape was. Garmin had previously based the OEM units on either an already released zumo™ brand unit or Garmin followed shortly afterward with a Garmin zumo™ unit. In the case of the NAV5, Garmin had just released the zumo™ 390 and it seemed unlikely that they would follow right on the heels of that unit with another unit using a different form factor. For BMW, the zumo™ 390 shape was not in keeping with the Navigator IV rectangular flat bezel which the BMW K1600GT and GTL dash were designed to integrate. In order to bring new features and hardware to it's customers, BMW contracted with Garmin to produce a BMW exclusive device.
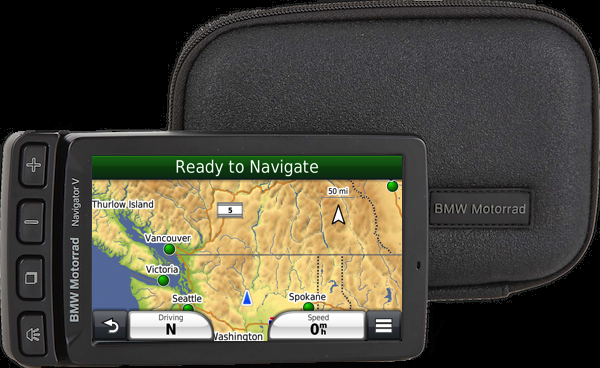
BMW Navigator V with exclusive Four Button Mount
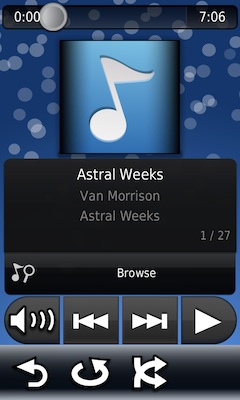
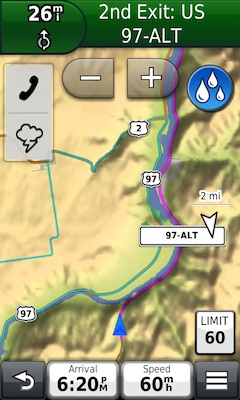
By now, if you had any interest in the NAV5, you probably know the specs but for those who don't know, it has a bright 5" TFT resistive touchscreen color display with a resolution of 800x480 pixels and supports 65K colors. The display supports either Landscape or Portrait orientation but only when the NAV5 is not in the Four Button Mount or the GPS Preparation Mount. The display certainly isn't high-res by current smartphone display standards but it is more than adequate for GPS receivers that need to be seen well in direct sunlight. I've found the on-screen text, graphics and color contrasts to be very good if your eyesight is "growing older" like mine. There is a slot for a customer supplied micro-SD Card that supports a capacity of up to 64GB and must be formated as FAT32: most come this way. It's not easy to get to the micro-SD Card as it's slot is underneath the Lithium-ion Rechargeable Battery pack which is behind a screwed down cover. Garmin supplies a nice little screwdriver with the NAV5: don't forget to take it with you. The NAV5 comes with City Navigator North America or City Navigator Europe maps preinstalled and includes Lifetime Map Updates.
If you're going to use a NAV5 on a 2013+ BMW R1200GS, K1600GT/GTL or a 2014 R1200GS Adventure, you will want to purchase the device without the Four Button Mount. But, you will need to make sure the bike is configured with BMW's GPS [Navigation] Preparation Mount which is a Dealer/Factory installed option. The GPS Prep Mount doesn't have any buttons, it has an extra cable that links the NAV5 to the bikes LIN bus and the new multi-controller switch on the left hand-grip as seen below.
As a friend pointed out to me recently, the multi-controller switch turns the new BMW's into a "remote control" for the NAV5 and clearly a safety feature that everyone should have for their GPS: at least that's what he told his wife after he purchased the NAV5 (he now owns a 2014 R1200GS Adventure).
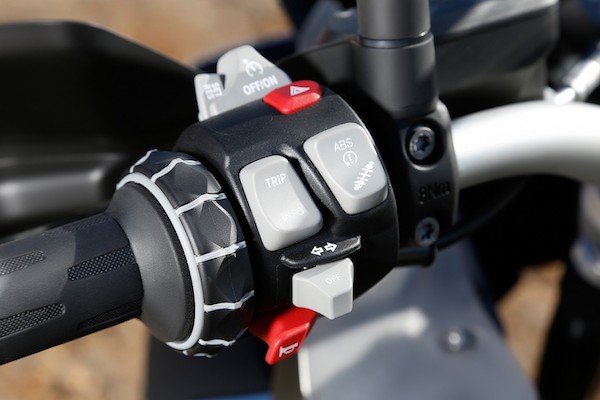
BMW's Multi-Controller for the Navigator V
If you don't own a 2013+ BMW GS, K1600GT/GTL or a 2014 R1200GS Adventure don't despair, you can buy the NAV5 with BMW's Four-button Mount. And, for an additional $18 you can also purchase an adapter pigtail for the Power Plug (BMW p/n 83 30 0 413 586) which will make it easy to adapt the NAV5 to any bikes 12vdc system. You won't have the added benefit of linking to the bikes Trip Computer and LIN Bus like the bikes listed above but you will have buttons. Those of you who have been waiting for a new unit to replace your GPSMAP 276/376/379/478/479 take notice.
If you find touchscreens somewhat difficult to use while riding, the programmable buttons provide quick access to the more often used actions while navigating: Map zoom In/Out, Page between Apps and Volume. When you are using any of the other Apps, the buttons may have additional functions which will be indicated on the Apps Menu Bar.
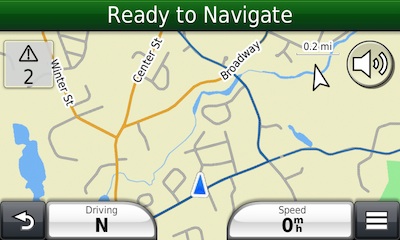
NOTE: The NAV5 screenshots I include in this review contain a lot of Portrait Mode views. This is for publishing purposes. Most users will be using the NAV5 in a BMW Mount which forces Landscape Mode. All screenshots have been scaled down to 400x240 pixels.
Features & Apps
The NAV5 will be a very familiar device for Garmin zumo™ and BMW Navigator IV users who choose to upgrade. For those new to Garmin's On The Road brand GPS receivers, you'll have a small learning curve but this isn't the most complex device Garmin or any other manufacturer produces. The Owners Manual will give you a reasonable start up the learning curve but Garmin never seems to provide all of the details. After that it's mostly just familiarizing yourself with where functions are in the various Apps and Settings.
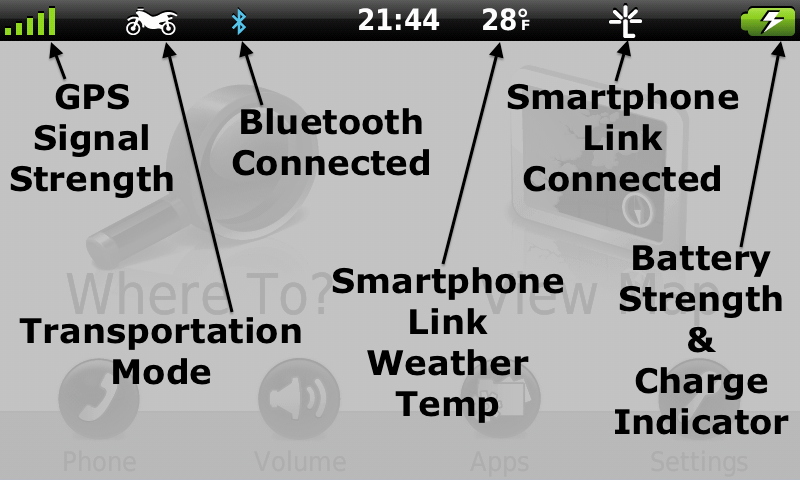
For starters, here is the Main Menu Status Bar:
The NAV5 is a touchscreen device so if you don't see an obvious "button" to do what you wanted, just touch something, it's probably an active button. There are two key controls on most of the NAV5 Apps screens:
- The Options Menu
 button. Press it and, yep you guessed it, you'll be presented with options. button. Press it and, yep you guessed it, you'll be presented with options.
- The Return
 button. If you press the Return button once you will go back to the previous menu. Hold it down and you will go back to the Main Menu. button. If you press the Return button once you will go back to the previous menu. Hold it down and you will go back to the Main Menu.
Over the past year I've been fortunate to be able to put a lot of miles on my bikes with various GPS receivers. Before the Apps and the large displays it's really about how well the GPS receiver records your position. The GPS software must also record a good representation of your travels in the Trip Log. The NAV5 GPS is certainly not as "good" as my Garmin Monterra with it's GNSS (GPS & GNONASS) receiver but it marks a location within the devices claimed specs of 10ft (3m) reliably. The Trip Log does exhibit quite a bit of noise when stationary like most of Garmin's On The Road devices so you will usually need to do some editing to clean up your Trip Log Tracks when you're home at the computer if you reuse or share them.
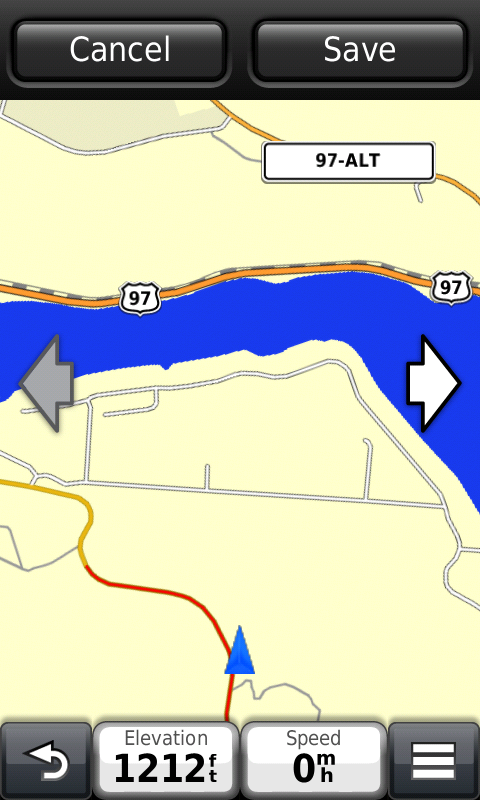
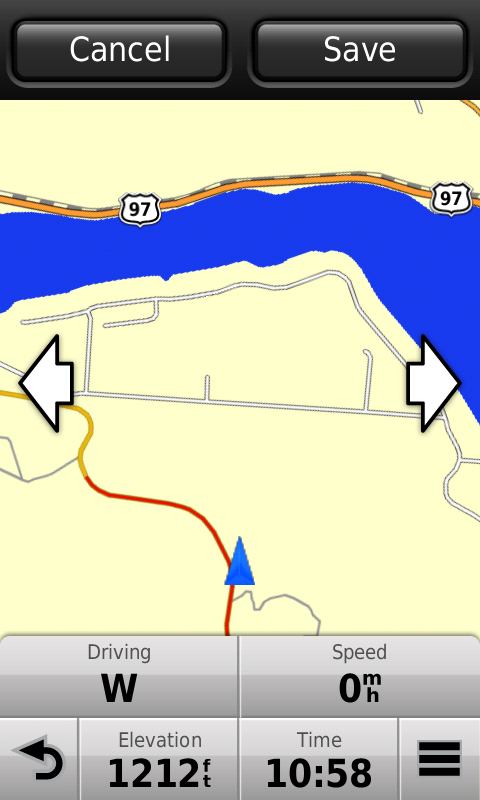
The images below are an example of saving a waypoint while sitting at my office desktop. I repeated this process five times by moving 30ft away from and back to the desk. All of the points were within a few feet of the same position offset. It certainly will do for an On The Road GPS.
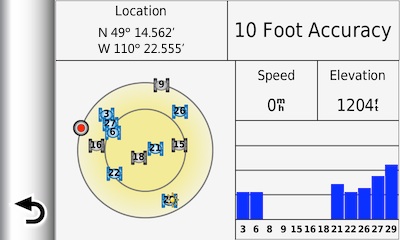
The GPS Satellite "view" from inside my home office... |
The Recorded Position was only 8ft off. |
Bluetooth connectivity  has been a feature of the On The Road Garmin units and BMW Navigators for quite some time. The NAV5 uses Bluetooth to connect to your cellphone and your Bluetooth Headset or your Bikes Audio services. The recommended Pairing Order is to pair your phone first and then your Headset. The Bluetooth communications has worked reliably for me. Just as I remembered from my zumo™ 660, the Phone App works very well when paired with my iPhone. I don't use it very often but when I'm out on the road for a long ride, it's good to be able to take those "urgent calls from home". has been a feature of the On The Road Garmin units and BMW Navigators for quite some time. The NAV5 uses Bluetooth to connect to your cellphone and your Bluetooth Headset or your Bikes Audio services. The recommended Pairing Order is to pair your phone first and then your Headset. The Bluetooth communications has worked reliably for me. Just as I remembered from my zumo™ 660, the Phone App works very well when paired with my iPhone. I don't use it very often but when I'm out on the road for a long ride, it's good to be able to take those "urgent calls from home".
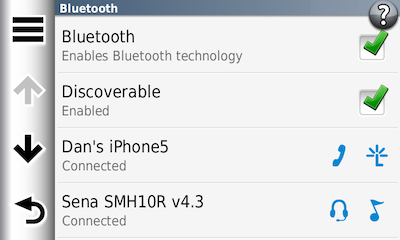
Devices Paired and their Status
|

The Phone App - "Browse Categories" is a Where To? Search
on the NAV5's data; it's not an Internet search with the phone. |
Although not mentioned in the Owners Manual, you can also use Bluetooth to share your Tracks, Trips & Saved Places with another NAV5 and the new zumo™ 590LM. Hopefully Garmin will continue this Bluetooth Sharing and include new Garmin devices from the On the Trail brand as well.
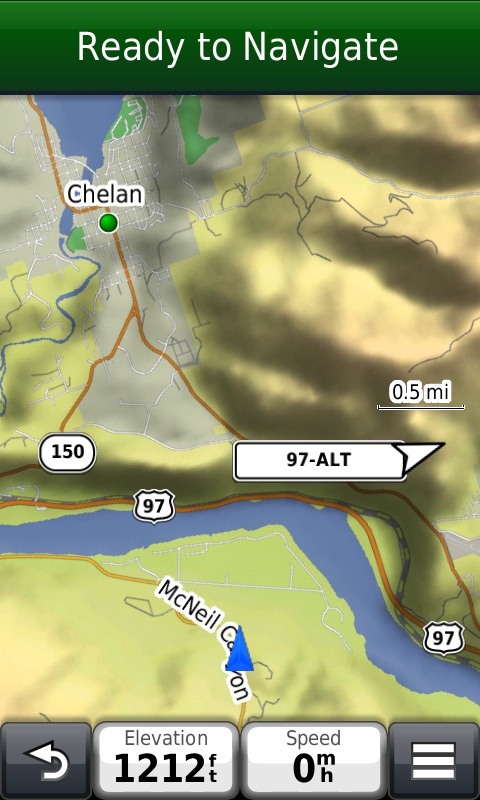
View Map is where most of us spend the majority of our time with the GPS so it's fitting to have some ability to customize that view. You can do so in a couple of ways. One of the more standard ways is changing the Dashboards. There are ten to choose from and except for the standard nuvi dash they all cover way to much map for my liking. I have included screenshots of a few of them below. One Dashboard that I was surprised to not find is the Four Corner Transparent Data Field Dashboard found on the zumo™ 660/665. That Dashboard provides the most map view while still providing the user their pertinent data; that's a bizarre omission given some of the Dashboards that are provided.
Standard nuvi Dashboard |
Four Data Fields at Bottom |
Really? |
Another Map customization is the Map Theme which allows you to change the map road-type and land feature coloring based upon European Union country requirements. Below are just a few of the Theme options and with most you have to look close to see the changes. These "theme" files can be duplicated and edited to create your own Theme but you'll need some Garmin Map development know how to get it right.
Garmin Theme |
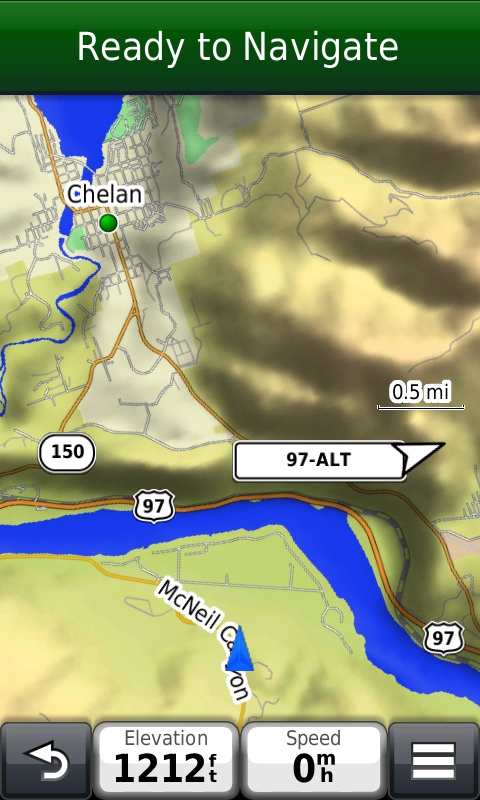
Italia Theme |
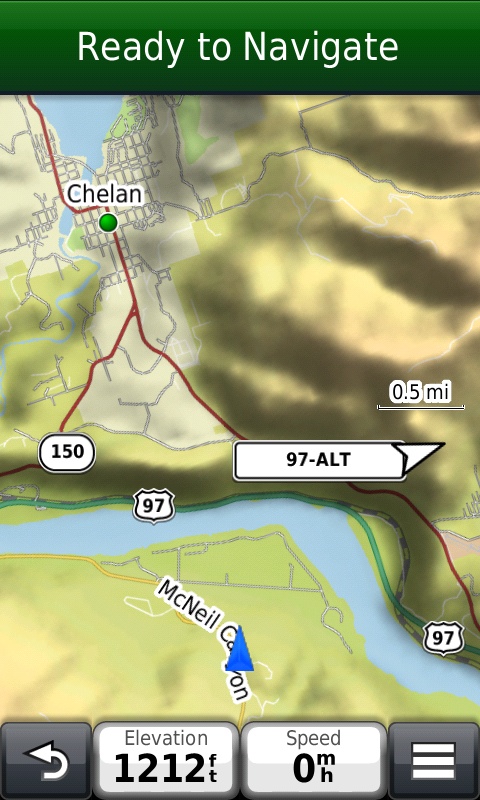
UK Theme |
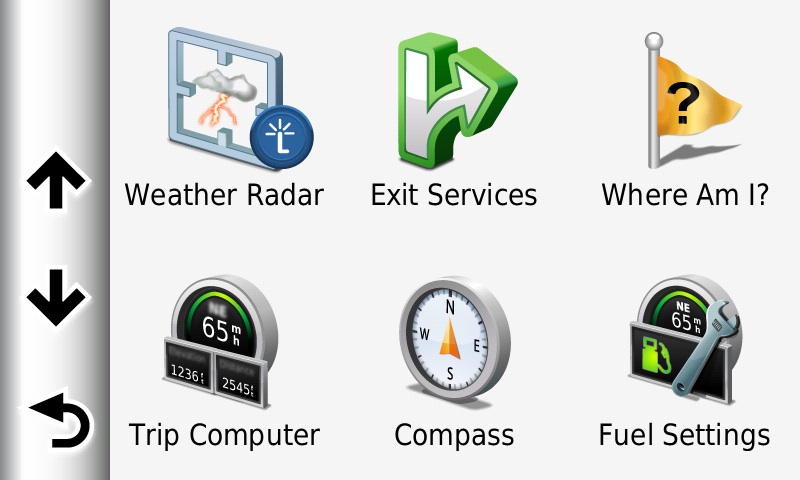
Finally, you can add two programmable buttons on the Map and these buttons can represent any of sixteen actions. Most of the options will call an App and a few are functions like Stop [Active Route] and Mute. The other choices are: Traffic, Media Player, Phone, Detour, Weather Radar, Exit Services, Where Am I?, Trip Computer, Compass, Fuel Settings, Map Layers, Brightness, Where To? and Traffic Cameras. All of these Apps or Functions are also accessible from the Map page Options Menu.
Map Button Settings page - Top button is Weather Radar |
From the Map - Select the Options Menu |
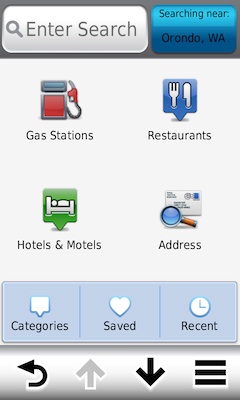
Where To? is the primary App on all nuvi-based Garmin GPS software today. As the search engine it will find any data you import, the POIs in the Map data and your Custom POIs.
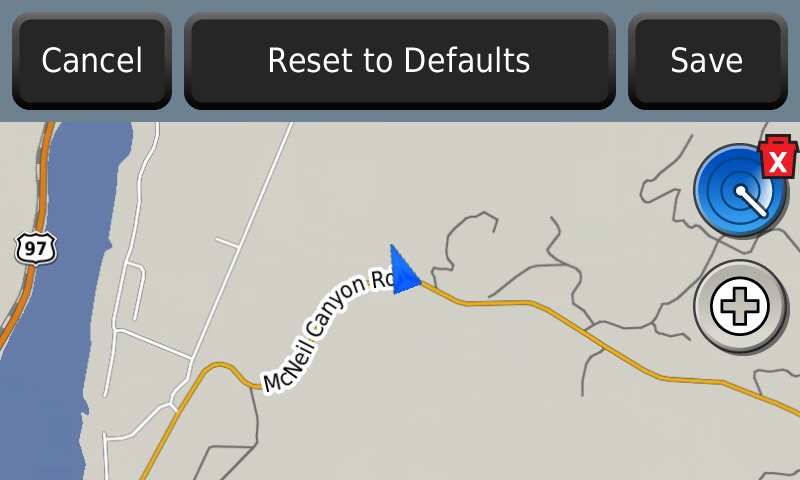
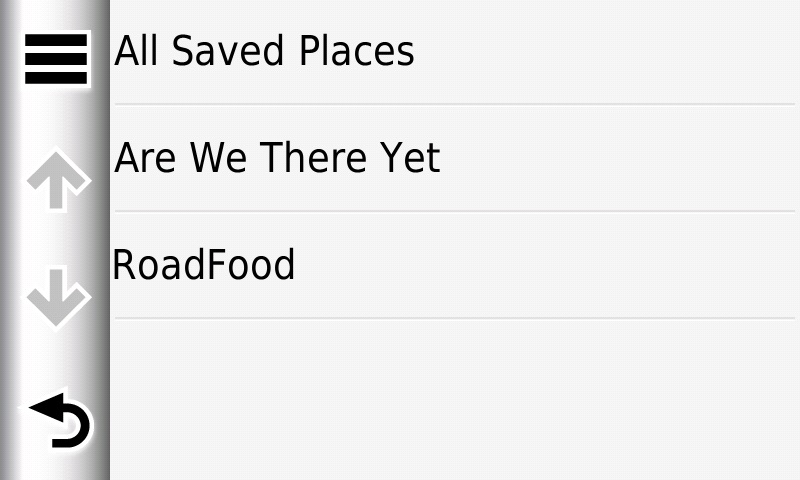
Where To? also manages your "Saved Places" or what we use to call Waypoints. You can import or save up to 1000 Places (Waypoints) which includes your "Home" location and Current Position. If you like to keep your data on your micro-SD Card like I do, when you transfer Waypoints to it and start the NAV5, you will only be able to access the Import function if you already have a saved location in your Saved Places. If you run into this condition, simply save your present location and then when you access Saved Places and press the Options button you will see the Import option.
Over the years Garmin has had a - sometimes more and sometimes less - standard set of Waypoint Symbols. Unfortunately, the NAV5 has decided to provide a new set of Symbols that are somewhat more representative of a Global product I suppose. This set of 46 Symbols is missing many of the older Garmin standards. One of my often used Symbols is Campground  which is no longer supported - but, Bowling Alleys are. So, if you find that many of your Waypoints on the NAV5 show a Hart (Favorite) Symbol, it's becuase the symbol you previously had assigned to the Waypoint is not supported by the NAV5. which is no longer supported - but, Bowling Alleys are. So, if you find that many of your Waypoints on the NAV5 show a Hart (Favorite) Symbol, it's becuase the symbol you previously had assigned to the Waypoint is not supported by the NAV5.
One of the other editable properties of your saved Places (Waypoints) is "Category": yes, they're back. As of v4.3 BaseCamp Categories and the NAV5 (and zumo 590LM) are the same and BaseCamp ListNames and Categories are no longer the same thing. Saved Places Categories should not be confused with the WhereTo? Category search, as it does not list your personal Waypoint Categories. This search section is reserved for your Custom POIs - the NAV5 does support Custom POI Symbols.
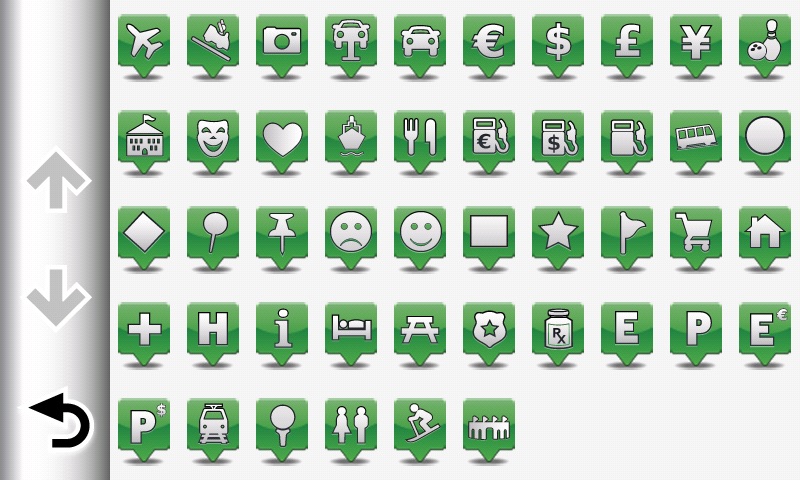
The new "standard" set of Waypoint Symbols: Bowling anyone? |
You now can create your own Waypoint Categories! |
As with the zumo™'s and previous Navigators, touching the Map position Icon will activate the "Where Am I" function. The Where Am I page, as seen below, gives you a number of current location search options as well as the quick way to save the current location to your Saved Places. And, BMW Roadside Assistance is at your finger tips if you should have a rare breakdown or run out of Gas out on the road. Just tap the number and. . ."Hello, Can you please bring me a gallon of Gas?"
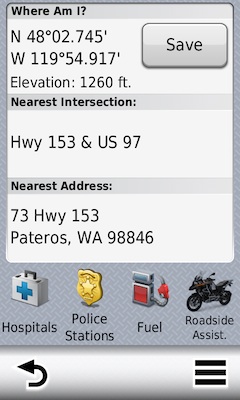
Where Am I? |

Touch to call - BMW Roadside Assist |
Your on-Map Phone control |
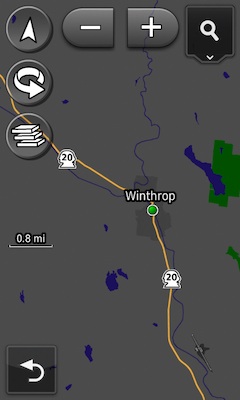
Where To? searching has been expanded to bring back many features that have been absent for quite a few years on the Motorcycle "ready" GPS receivers from Garmin. The most pleasant surprise is searching along My Active Route. I did a little testing of this feature and it appears as though the search area is confined to 0.5mi (0.8km) each side of the route. This is both good and not so good so some user interaction may be necessary. It would be nice if there were a user definable "radius" setting for this search.
Options for Where To?'s Search Near:
Touch the Search Near field
and make your selection |
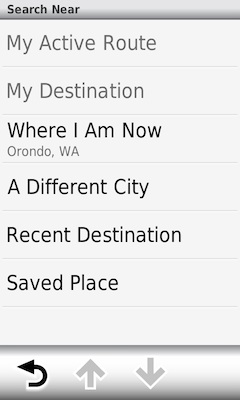
My Active Route and My Destination
require an Active Route |
A really nice feature (thank you Garmin) is the ability to preform a WhereTo? search from the Map page using the on-Map search button. The default "search near" is the center of the Map regardless of your current physical position and you have to be at 0.8mi or lower scale to activate the WhereTo? button. Once it's active you can move the map and zoom-in/out on the map as you desire before selecting your search. I think it would be a great enhancement if you could choose to do an "area" search or "along an active route" search from the Map. If you think so too, ask for it at www.Garmin.com/ideas.
TIP: Even though the search results may only show one return, zoom-in on the area and look for small Blue Dots.
Pan the Map, zoom to
0.8mi (1.2km) or closer and... |

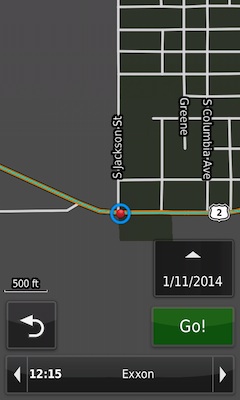
Touch the Search button and Category
|

Choose a destination and press Go!
|
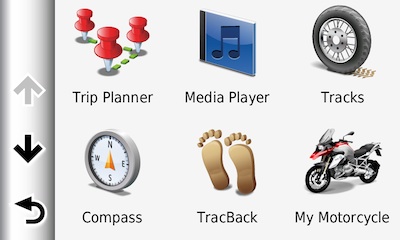
Apps are appropriately found behind the Apps Button on the Main Menu screen and include the following:
- Trip Planner:
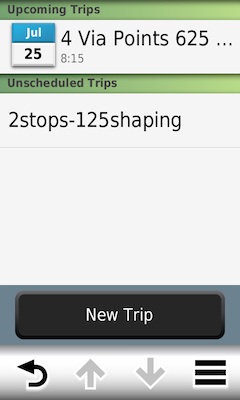
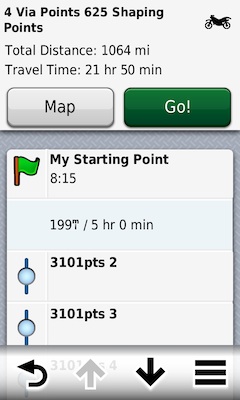
This is the App that manages your routes or Trips. I don't know why Garmin's On The Road group found it necessary to change long standing nomenclature but a route and a trip are the same thing and even the Owners Manual mixes the terms. I imported 200 Trips created in BaseCamp and the NAV5 indicated that all were imported. Looking at the Trip Planner list of Trips only shows the first 100 (sorted alphabetically). If you delete that first 100, the Trip Planner will then show you the second 100. So, if you have a need to load that many Trips, make sure you name them appropriately and split up your routes putting 100 on Internal Storage and 100 on the SD Card. Now the Trip Planner Importing menu will show you all 200 Trips but you can still only import 100 at a time. You can create new Trips here and edit saved ones. If you transfer a route to the device from BaseCamp that has more than 30 Via Points/Stops in it the NAV5 software will separate the trip into the necessary number of trips. Another feature of the NAV5 is that it supports Mixed-Travel Routes from BaseCamp which means it also does not recalculate Routes Transferred to the unit. This is quite beneficial for those times when the road you want to travel is not shown on your map. If you read your NAV5 Owners Manual it stated that you could have up to 29 Via Points (Stops) plus the final Destination and each of the segments defined by those Via Points can have up to 50 Shaping Points (points not Flagged or Announced in the route). I guess some one at BMW must have upped the requirements because the actual number of Shaping Points between Via's is now 125. So, if you do the math; 30 x 125 = 3750 shaping points you can use to define or shape your route path in BaseCamp. If you can't get a route to go where you want with that many points, something is seriously wrong with your map or you might try using more than one route. The Shaping points do have a small light-blue Dot on the map but those are a lot less obtrusive than the Orange Flags that represent your Via Points. I've found it very easy to lay out most routes using just a few Via points (waypoints) since the NAV5 does not recalculate imported Routes.
Trips are easy to edit in the Planner
|
Press the Options Menu
and select Edit Destinations |
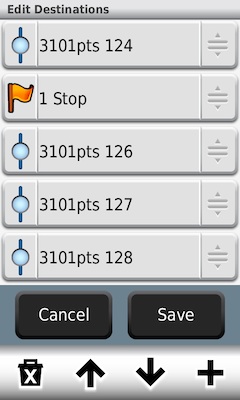
You can move, change, add and delete
Stops and Shaping Points |
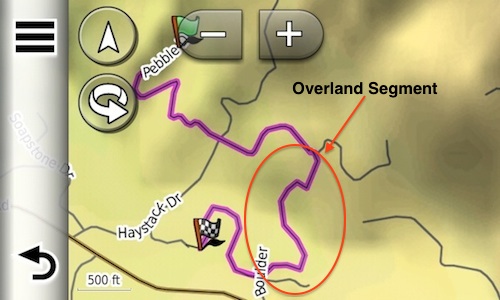
Which brings us to those special routes that have to traverse areas of the map that don't have marked roads. Garmin now calls these routes Mixed-Travel in BaseCamp since part(s) of the route follows routable roads on the map and part(s) of the route travels overland (see the screenshot in the Tracks section). In BaseCamp these are easy to construct if you have a Track of the overland section(s). Simply create your route up to the point of leaving the mapped road, set a Via Point and then open the route properties and drag/drop the track into the properties points list after that Via Point you just set. Then at the end of the track segment place another Via Point and continue along-road routing with the appropriate route tool or just drag&drop the next along-road route segment into the route points list after the last Via Point. The reason for placing the Via Points at the start and finish of the overland segment is so you can adjust the number of Shaping Points (track points) you inserted: there can only be a maximum of 125.
If you are going to navigate a Mixed-Travel Route or a Track that you converted to a Trip, set your Settings->Navigation->Off-Route Recalculation to Off; unless you know that a recalculation is OK and will not change the original route path. If you set Recalculation to Off and you deviate from the route path, the NAV5 will not recalculate your route and mess it up; it just lets you go where you want to. If you do forget and it does recalculate, simply stop the Active Route and change the Recalculation setting and restart the Trip from the Trip Planner.
One final Trip navigation feature to note. While you are navigating a route, if you need to adjust your Avoidance settings you can do so while the route is active. Just change your Avoidances and the NAV5 will automatically recalculate the route almost before you can return to the Map. I found this very handy when I ran into an area where I knew the road was paved but the map didn't. I just reset my Avoidances and the routing quite telling me to make a U-turn.
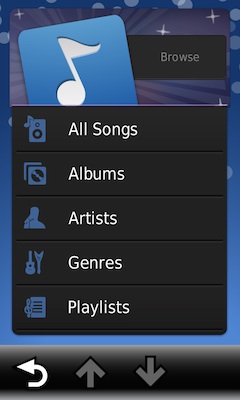
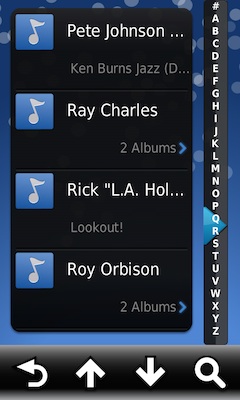
- Media Player:
Some will like this feature while others will have no use for it. The Player only plays MP3 audio files and they need to be placed in a folder that you can name anything you wish: I use MP3. This folder can be on either internal storage or on your microSD Card; I recommend the micro-SD Card as it will most likely have more space for music and audio books. For the Player to be active you must have at least one MP3 file on the device and you must have your Bluetooth Headset or Bike Audio connected. My 64GB microSD Card currently has ~20GB of music and books and the indexing time is acceptable.
TIP: To improve indexing time use folders to organize your media by having your media tracks inside of Album folders and those Album folders inside of Artist folders in the MP3 folder.
- Tracks:
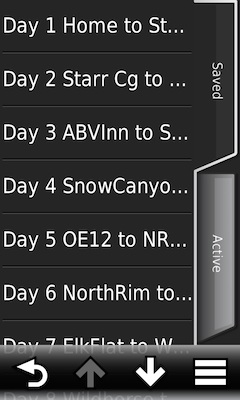
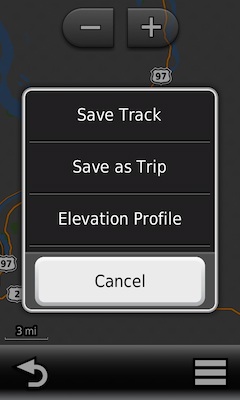
The NAV5 handles Tracks very well for a Garmin On The Road device. You can Import up to 200 Tracks to the Tracks App and each of those tracks can have up to 15,000 points. You can have up to 15 of your tracks showing on the Map concurrently which puts the NAV5 in the same league as many of the newer On The Trail handhelds for showing total Track Points on the Map. If you want to navigate a track you can do so in two ways. You could just enable the Track settings to "Show on Map" and then following the track path on the map. Or, you could go one much better and use the "Convert to Trip" option. Start by selecting the Track and then select the "wrench" icon on the overview page. One of the Edit options is Convert to Trip. This is an excellent feature for those of us that travel on roads or trails that may not be on the map. Converting the Track will create a new Trip (route) of the same name in the Trip Planner that is usually a complete representation of the original Track. When I do this I always set the original Track to "Show on Map" and set the color to Black. Now when I want to navigate the Track I go to the Trip Planner and select my "converted-track" and press GO. What you'll see on the Map page is the magenta route path of your Trip with a black line in the middle that is the original Track; it's just in case the NAV5 doesn't quite get the conversion correct. This same Track to Trip conversion software was first developed for the zumo™ 660 so it's been in play for several years now.
Active Route with original Track in black showing on the Map also...
All Garmin GPS receivers have a Track (Trip) Log that records your every movement should you have the Log enabled: Settings->Device->Travel History - Check. With Travel History enabled you also enable the TracBack and Where I've Been Apps (see below). You also have the option of showing your Trip Log on the Map as you travel (it's that Cyan line trailing behind you) via the Map Layers function: not showing the Trip Log on the Map is not the same as disabling Travel History. The Trip Log manages the Tracks you lay down as you travel in "segments" before it bundles them up into an Archive file. The NAV5 can save 20 Archive files and each file will contain 10,000 track points irregardless of the number of segments: that's a lot of travel. The active track segments can be found inside the Active tab of the Tracks App. As you travel, your completed routes are saved as a Track Log segment. Stops of over and hour in a Trip will generate a Track Log segment. These segments can be found in the Active tab and are also viewable with the Where I've Been App (see below).
200 Tracks can be saved here!
|
Active Trip Log segments
are kept here until Archived
|
Any of your Saved Tracks
or Active Segments can be
converted to a Trip |
- TracBack™:
This feature has been on Garmin devices for many years. It allows you to navigate back the way you just came. It reverses your current Trip Log, converts it to a Trip and starts navigation. There's not much more to say about it and it would be pretty hard to get lost with this feature enabled. Remember, you do need to enable your Trip Log (Settings->Device->Travel History) for this to work!
- Compass:
This is not an electronic compass. It uses the GPS heading and for it to work properly you must be moving and have a good GPS lock.
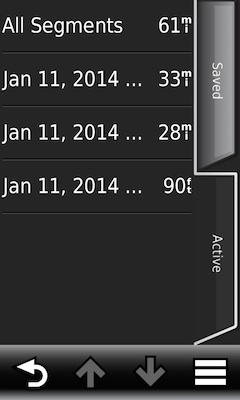
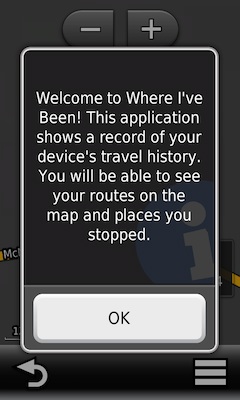
- Where I've Been:
This is a handy Daily organization of your enabled Trip Log; the same Track segments you found in the Tracks App's Active Tab. This App lets you see those segments by Date on the Map along with a red dot that represents the segment end-point where you stopped. Touch a red dot and the App will give you what it thinks is the location info based upon the map data. If you want to be routed back to that location from where you are now, press Go!
Very handy App!
|
Basically showing your Trip Logs
on the map by Date and Places
you stopped. |
Most places you can select a Track
you can save it or convert it.
|
- Last Spot:
When you remove the NAV5 from a powered mount while still on, the device records your position as your "last [parking] spot" just in case you forget where you parked your bike.
- World Clock:
Along with the time at your current position, you can have three additional cities programmed.
- Alarm Clock:
Very simple, you set a time and check Alarm On. Not much else you can say about this App other than it works even when the unit is in Sleep Mode. When the alarm goes off, the unit wakes immediately but it takes a few seconds to wakeup and connect your Bluetooth headset for the Alarm audio.
- Calculator:
Your basic calculator--but it is handy.
- Units Converter:
You can convert the following: Distance, Speed, Area, Currency, Temperature, Volume and Weight. You'll want to update the currency conversion rates which it lets you do manually.
- Help:
A pretty basic Help App but not bad if you need a reminder as to how something works or where to find that feature you just remembered.
These last five Apps are "connections" to the Smartphone Link App which is free to install on your cellphone. Without Smartphone Link installed the following are non-functional. Several of them require a Service subscription but if you aren't interested in subscribing to the following services, you can still use Smartphone Link on your phone to send location lookups to the NAV5 and look for Parking.
- Smartphone Link
 : : The Smartphone Link App on the NAV5 and on your smartphone show your connection status and Service Subscriptions. This App is a great idea for giving the NAV5's access to valuable travel data. Of course it is limited by your smartphones Cellular Data Plan. The Smartphone Link App is partially integrated with it's counterpart on your cell phone. For example, you can initiate searches and save locations with the App on your phone and send them to the NAV5 but you cannot initiate a search from the NAV5 using the phones network connection. Also, when you do send a location to the NAV5 from the phone App the location contact information (Phone #, Address) are not transferred. This may be a Licensing restriction of the service provider Garmin is using in the Smartphone App but it's worth asking to have it included. Ask for it at www.Garmin.com/ideas.
Oddly enough Garmin removed two interesting services, GasPrices and Tracking, from the last version update. With the power of a connected smartphone, I can think of a number of value-added Services and features Garmin could add to Smartphone Link so I hope they will continue to improve this App.
- photoLive:
Traffic Cameras are based on your current location unless you are in one of the US States that are not supported: Alabama, Alaska, Arkansas, Hawaii, Mississippi, Montana, New Mexico, North Dakota, Oklahoma, Rhode Island, South Dakota, Texas, Vermont and West Virginia. But, just because these States are listed as unsupported, I have found cameras in a couple. For the one-time $5US fee, you can't really go wrong. Garmin uses the service TrafficLand.com so check the site out and see if your area is covered.
- myGarmin™:
This App shows any messages from your myGarmin Account that Garmin sends to you like Subscription acknowledgments.
- Dynamic Parking:
This is a rather limited free service in that it only shows Parking Lots near your Destination that are owned by "partner companies" of the service provider BestParking.com.
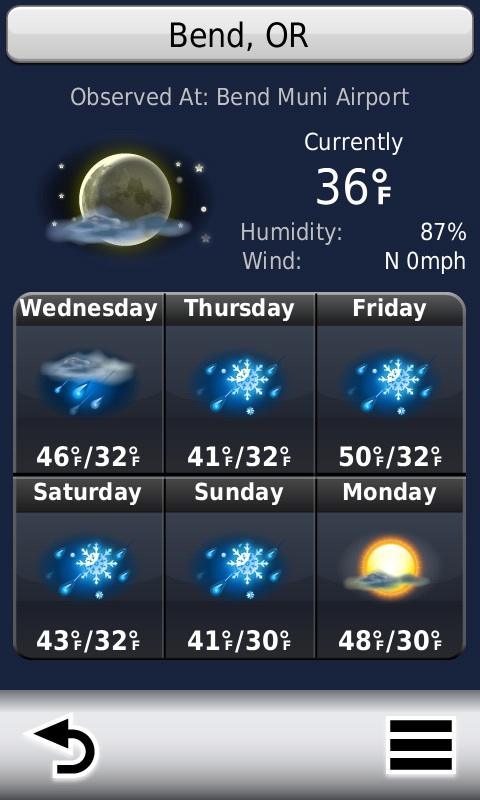
- Weather:
This Service is provided by Garmin's My-Cast service and uses the Garmin DCI weather network. It is arguably the most valuable service offered. I subscribed to the Weather Service and so far I think it's a good value for the information it provides. You can access the Weather App by pressing the Apps button on the Main page and selecting it. There you'll find the weeks forecast for your Current Location however that location is really the closest commercial Airport. If you choose one of your customizable favorite locations the same condition applies. For example, I live 50 miles from the nearest commercial Airport where Smartphone Link Weather shows me the "local" weather even though there are no less than 6 National Weather Service reporting stations within a 10 mile radius of my location. In Europe this approach might be quite acceptable but in the wide open spaces of North America it is not as localized as it could be.
The Weather App - touch a day...
|
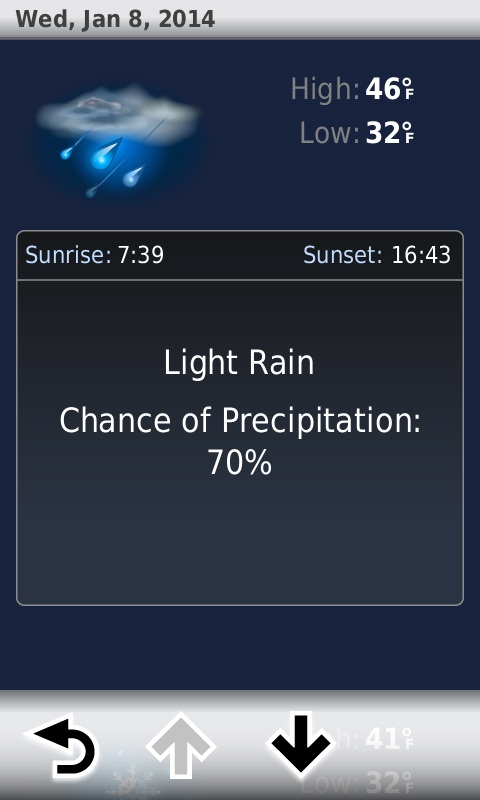
and you see the detail.
|
From the Options Menu you
can select Road Conditions. |
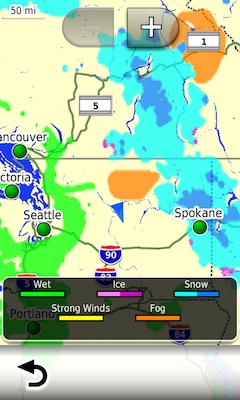
The Weather Alerts and the Weather Radar features are well integrated with the Map. Alerts also produce a two-tone sound in your Headset. The Alerts button on the upper left of the map is only shown when there are Alerts. You can add the Weather Radar button as one of your two programmable buttons on the map and the Weather Radar button changes it's ICON according to the Current Location Forecast. The Weather Radar App can also be accessed from the Map page using the Options Menu. The Weather Radar and Alert map views open at a 50mi scale and zoom in to 12mi scale. They are a moving map and show your Current Location and Active Route if you're navigating. The Weather Radar button provides enough information that it is probably the only programmable button I would add to my Map page given how much map view it covers. Like most of the NAV5's on screen buttons, it's easy to touch with winter or rain gloves on--and you will also hear the two-tone "alert" sound in your Headset when an alert is posted to the NAV5.
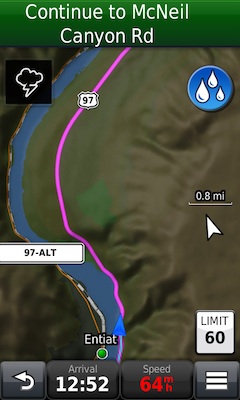
Touch the Weather Alert
button upper-left.... |
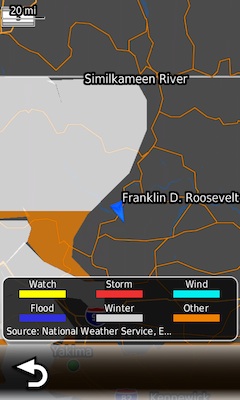
You get the Weather Alert Map.
Touch the Alert Area... |
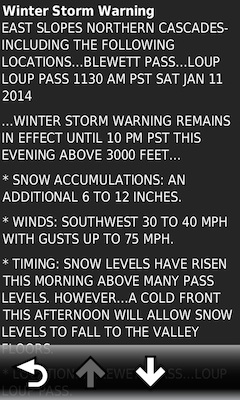
You get the Weather Alert Text!
|
The Navigator V and your 2013+ R1200GS or 2014+ R1200GS Adventure
There are a significant number of BMW Exclusive features coded into the NAV5 that are only activated if the device is connected to either a 2013+ GS or 2014+ GS Adventure using the BMW GPS [Navigation] Preparation Mount: not the Four Button Mount. These features and Apps receive data from the bikes Instrument Cluster and Trip Computer via the LIN Bus. This enables the Multi-Controller Switch to be used with the NAV5 and it allows the bike to use the NAV5's Time and Date data which is very nice if you travel across Time Zones: you must initiate the Time/Date integration manually via the Instrument Cluster SETUP menu.
On bikes with the BMW Multi-Controller Switch and the GPS Prep Mount there is a custom menu page that is included as one of the five pages that can be scrolled to using the Multi-Controller. The Call Home, Detour and Skip functions were added at software version 2.80. The other pages include; Map, Compass, Media Player (if you have MP3 files on the device and a Bluetooth Headset Paired) and My Motorcycle App--which is much like the Trip Computer although not as easy to see in my opinion.
 |
 |
The bikes Instrument Cluster also has a number of sensors that can provide some interesting information as well as control of the NAV5 itself. For example, if you enable the Garmin Lock feature on the NAV5 with a four digit PIN code and location, when the NAV5 is mounted it links the bikes VIN number as a security code. Mount the NAV5 on the bike, turn on the key and the NAV5 will startup and unlock: no need for the Garmin Lock PIN code. If the NAV5 is removed from the mount the Garmin Lock PIN Code is required (unless you're at your Security Location). BMW says you can link up to FIVE bike VIN numbers to one NAV5: cool, more bikes! On a less bright side, the NAV5 screen backlight brightness can be controlled by the Photo Sensor in the bikes Instrument Cluster. To enable this feature, on the NAV5 go to Settings->Display->Backlight and check the "Automatic" box. This Settings option is only available if the NAV5 is mounted to the bike and the key is ON.
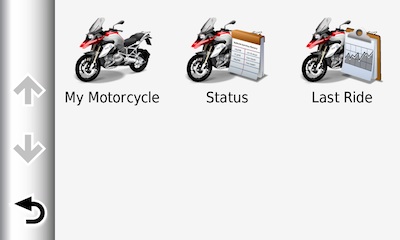
The My Motorcycle Apps - A collection of three BMW specific Apps on the NAV5 that are only accessible if the NAV5 is or has been connected to one of the BMW's mentioned early in the article. These are some interesting Apps and although somewhat redundant with the Instrument Cluster information, they provide a lot of data to the rider both on and off of the bike that the Instrument Cluster does not.
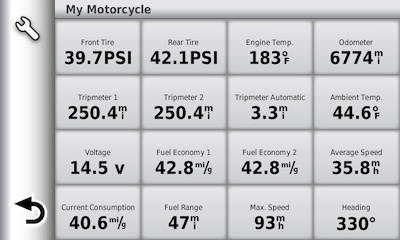
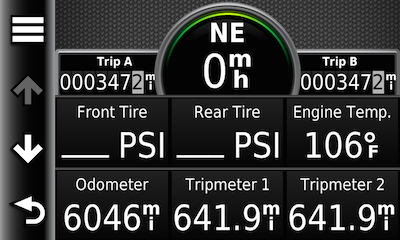
- My Motorcycle - This App page basically provides User Configurable Layout of Data Fields. Some of the more interesting Data Fields:
A new feature provided with software version 2.80 on the GS/GSA is an enhancement to the Trip Computer. When the NAV5 is in the GPS Prep mount the data fields of the Trip Computer are changed to read the My Motorcycle data from the LINBus. The K1600GT/L still has the Trip Computer as one of the pages that the Multi-Controller Switch can cycle through. The GS/GSA get the My Motorcycle and Compass pages but not the Trip Computer.
- Status - The Status & Warning Alerts use the same map button location and Alert pages as the Weather Alerts discussed previously and only shows on the Map page when the NAV5 receives one of the alerts noted below. When you do receive an Alert(s) you will hear the two-tone "alert" sound in your Headset and there will be a "banner message" momentarily displayed at the top of the map.
 |
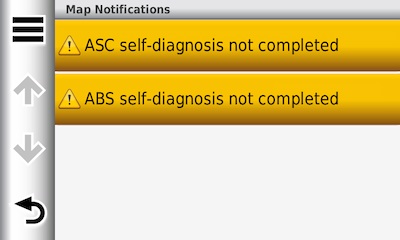 |
These are the same alerts that you will see on the Instrument Cluster display but with verbose information messages and/or the ability to generate helpful navigation information. The alert button on the map page will indicate how many items there are on the Map Notifications page. Pressing the alerts button on the Map Notification page will bring up it's message or, in the case of Fuel Reserve Warning, generate a Where To? search for Gas Stations near your current location.
The following Status and Warnings are supported:
- Red Warning Light
- Yellow Warning Light
- Fuel Reserve Warning - you don't need to set the "Fuel Tank Warning" in the Fuel Settings (located in the Map Options) as the bike will provide this data with the NAV5 in the mount.
- ABS Status
- ASC Status
- Tire Inflation Pressure Warning
- Lighting Fault
- Low Engine Oil Level
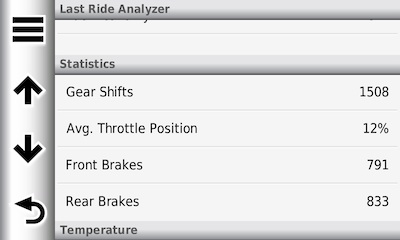
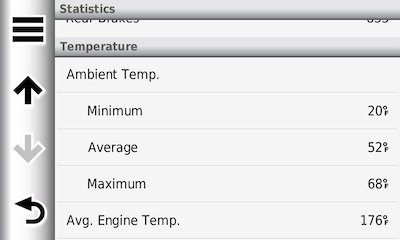
- Last Ride - This App interfaces with the Instrument Clusters sensors and the bike computer to create a log of the bikes operation. This is a rather amazing feature usually only obtained from a high-end, an expensive, Racing Data Logger. You can only access the Last Ride App when the NAV5 is out of the mount.
Adventure Riding GPS Criteria
If you've read any of my previous GPS articles, or attended one of my classes, you know I've been using this "Basic Criteria for an Adventure Riding GPS" to determine if any GPS is something I would recommend to our clients--or anyone else. Let's see how the BMW Navigator V features and functions stack-up.
- Pre-ride Planning: The Navigator V is compatible with data created in Garmin's BaseCamp Trip Planner feature on both Windows and Mac computers. Your Departure, Layover and Arrival Times are all transferred to the NAV5. In addition, you can create new and edit saved Trips on the NAV5.
- Finds stuff for you: The Where To? feature is back to the full function search App that it use to be. It will help you find any data that is included in your map set and make it relevant to your current location or a location you choose. And, as you read above, if you have a connection to your phone using Smartphone Link, you can use your phone to look for locations and send them to your NAV5.
- Import and navigate Tracks and Trips: In either case, the NAV5 is one of the best navigation devices Garmin [and BMW] has offered for our purposes. Importing routes without any recalculation and providing Track support that will make the On The Trail folks a bit envious.
- Record a ride: The NAV5 doesn't do anything fancy when it comes to the Trip Log (track log) like the Garmin handheld units but it does record your travel and it will record a history of where you have stopped and your travel trends. For most of us, features like saving the Trip Log for future use is the most important.
- Archive a ride: The NAV5 does Archive the Trip Log on an as-full basis. I prefer to separate my logs by Day. This is not a settable option on the NAV5 so I make it a habit of Saving my Log to the Tracks-Saved list at the end of each day. This is not as user configurable as the features of the On The Trail units but it is workable.
- Share a ride: The NAV5 can share saved Trips, Tracks and Places by saving them to your micro-SD Card (don't forget your screwdriver). The menu also offers the option to "share" via Bluetooth but this is a proprietary implementation from NAV5 to NAV5 only.
- Portable, ruggedized and waterproof: Yes, yes and yes; as we have come to expect from Garmin.
- Powered by Battery and external 12VDC: The NAV5 has a replaceable Lithium-ion battery pack and uses Garmin's well designed externally powered mounts.
- Glove Friendly: The on-screen buttons are large and easy to select. The resistive touchscreen uses a matte finish so as to be glare free but I use a NuShield's DayVue™ clear screen protector to eliminate the chances of scratching.
- Import and Create Waypoints and display their properties: The NAV5 certainly passes this criteria as outlined above.
- Software is user upgradeable: Yes, either by using Garmin WebUpdater or Garmin Express. I've used both and they work fine on both Mac and Windows computers. But, you will need to use Garmin Express to Register your NAV5.
- Reduce stress and Encourage Exploration: After several years of using this category it will no longer be a part of my criteria. I've realized that there probably isn't an electronic consumer device made today that is stress free and if you purchased a GPS you most likely have the desire to explore.
- Optional World Wide Maps and Map Types: Garmin is the undisputed leader in consumer GPS sales. I believe that this came about mainly because they “allowed” their map technology to be reverse engineered by third party map developers over the years. Although not officially supported by Garmin, there are map products that cover the globe and many are free. The NAV5 of course supports all of the Garmin City Navigator maps and some of the other Garmin On The Road map products but I suggest you call Garmin Tech Support and check compatibility since the NAV5 doesn't show on any of Garmin's Map Compatibility lists.
In Summary
The new BMW Motorrad Navigator V easily meets my criteria for Adventure Riding GPS receivers and it might even work well for some Dual Sport riders but that will depend upon personal preferences. If you decide the NAV5 is for you, check it out at your local BMW Dealer because you can't buy it anywhere else.
Adding another good one to my Recommended List:
- Garmin GPSMAP 276, GPSMAP 376, GPSMAP 478 (supported, no longer recommended)
- Garmin zumo™ 660, zumo™ 665
- BMW Motorrad Navigator IV
- Garmin Montana 600 Series
- Garmin Monterra
- BMW Motorrad Navigator V
While I was waiting for my 2014 R1200GS Adventure to arrive Mr. Bob MacFarland (Emoto) provided me with the My Motorcycle Apps screenshots above using a NAV5 mounted on his 2013 R1200GS. Thanks Bob!
I continue to evaluate GPS models from many manufactures in an effort to be knowledgeable in the current technology and to enable us to recommend the most appropriate GPS receivers for Adventure and Dual Sport Riding. I also watch to see how the GPS offerings might cause me to update my evaluation criteria. If you have comments or questions please send me an email by visiting our Contacts page. If you enjoyed the article please use the Facebook and/or Twitter buttons and share it with your friends.
Good Navigating.
Cheers,

Dan Townsley - All Things GPS
|